Setup Non HA Kubernetes using K3S

Last Update: 25 February 2025
K3S
Resources
- Quick Start K3S
- K3S: Setup dan Konfigurasi Kubernetes Cluster
- MetalLB: Installation with Helm
- Helm: Installing from APT - Ubuntu/Debian
Non-HA Control Plan Setup and Configuration
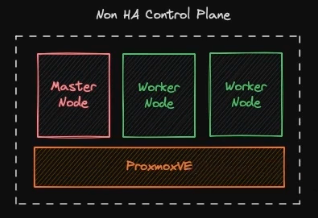
The implementation Scenario will be configured:
- 1 Master Node
- 2 Worker Node
These three nodes will be deployed in Proxmox VE, with each specification of node:
- 4 vCPU
- 16 GB of memory
- 50 GB of storage
- Ubuntu 20.04
Step by step
VM Setup
-
Update and upgrade the package repository to the newest version.
sudo apt update -y
sudo apt upgrade -y -
(optional) rename and set /etc/host for each node became:
- Master node →
kube-master-1 - Worker node →
kube-worker-1,kube-worker-2
#edit /etc/hosts and add this at the end of file (adjust ip address)
10.0.2.200 kube-master-1
10.0.2.199 kube-worker-1
10.0.2.198 kube-worker-2 - Master node →
-
Reboot to finalize the upgrade and apply the hostname.
-
Install docker with this script (Docker: Install using the conveniencescript)
curl -fsSL https://get.docker.com -o get-docker.sh
sudo sh get-docker.sh -
Check docker command and version
docker ps
docker version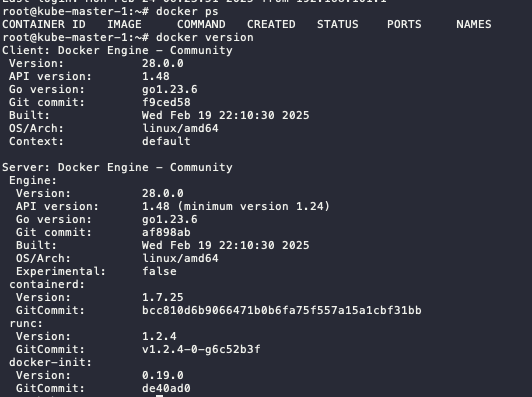
Master Node Setup
-
Defined the K3s token. Save this token and make sure this token is the same for all nodes
export K3S_TOKEN=kubernetesdemo123 -
The installation of master node, using this script:
- install the server as master node
- disable Traefik for ingress → will use Nginx ingress
- disable Servicelb → will use MetalLB
- disable local-storage → will use Ceph CSI
- declare to use docker
curl -sfL https://get.k3s.io | sh -s - server --disable traefik --disable servicelb --disable local-storage --docker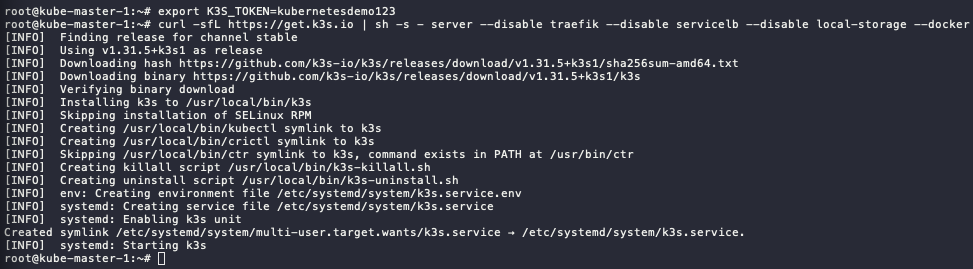
-
Check the service status, make sure it is active
systemctl status k3s.service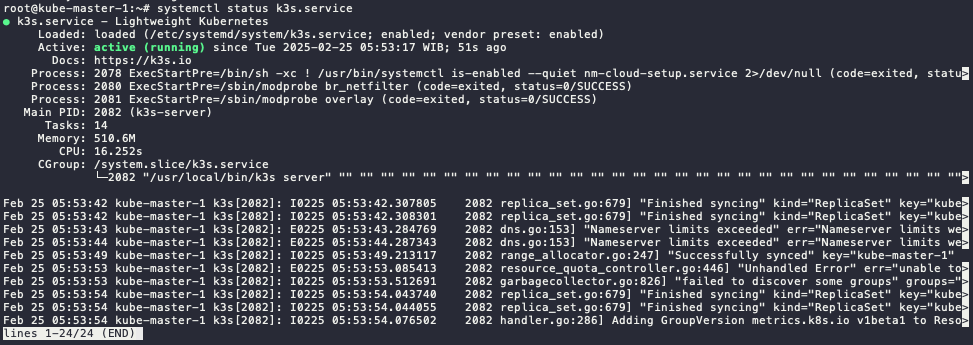
-
Check kubectl command. It will display 1 node only (which is the master node).
kubectl get node
⚠️ if the get error
unable to read /etc/rancher/k3s/k3s.yml, you can fix with this step.mkdir .kube
sudo cp /etc/rancher/k3s/k3s.yaml .kube/config.yaml
sudo chown $USER:$GROUP .kube/config.yaml
export KUBECONFIG=~/.kube/config.yamlor if you have not start the installation, you can add
--write-config 644in the end of the script, like this:curl -sfL https://get.k3s.io | sh -s - server --disable traefik --disable servicelb --disable local-storage --docker --write-config 644
Worker Node Setup
Do this step for all the worker node, in this scenario will be kube-worker-1 and kube-worker-2.
-
Defined the K3s token. Use the same token as defined in master node.
export K3S_TOKEN=kubernetesdemo123⚠️ If you forget the token on the master node, you can check and on the master node on this file. Copy all the string.
cat /var/lib/rancher/k3s/server/node-token -
The installation of worker nodes, using this script:
- install the server as worker node (agent)
- declare to use docker
- define the server endpoint to master node ip or domain
curl -sfL https://get.k3s.io | sh -s - agent --docker --server https://kube-master-1:6443 -
Check the service in the worker nodes
systemctl status k3s-agent.service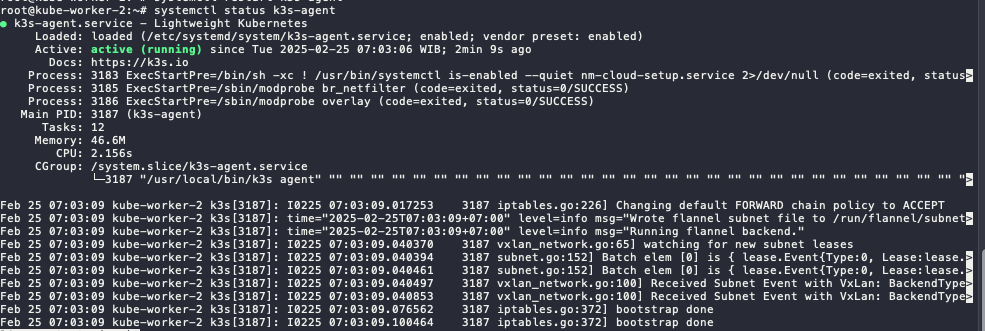
-
Check kubectl command in master node. Now, it will display more than 1 node (which is the includes all the installed worker nodes).
kubectl get node
⚠️ If you stuck in when starting k3s-agent. Make sure worker node and master node can be connecting. it could be firewall, proxy server, or incorrect/mismatched MTU. Script below can be use for check the connectivity.
curl -ks https://ipaddress:6443/ping
Install and Configure services in the Master Node
Because we disable some service in the master node. Now we are going to install it the replacement services.
HELM - Package Manager Installation
-
Install Helm using script below (the latest script can be seen on the Helm docs):
curl https://baltocdn.com/helm/signing.asc | gpg --dearmor | sudo tee /usr/share/keyrings/helm.gpg > /dev/null
sudo apt-get install apt-transport-https --yes
echo "deb [arch=$(dpkg --print-architecture) signed-by=/usr/share/keyrings/helm.gpg] https://baltocdn.com/helm/stable/debian/ all main" | sudo tee /etc/apt/sources.list.d/helm-stable-debian.list
sudo apt-get update
sudo apt-get install helm -
Check the version
helm version
MetalLB - Load Balancer Installation and Configuration
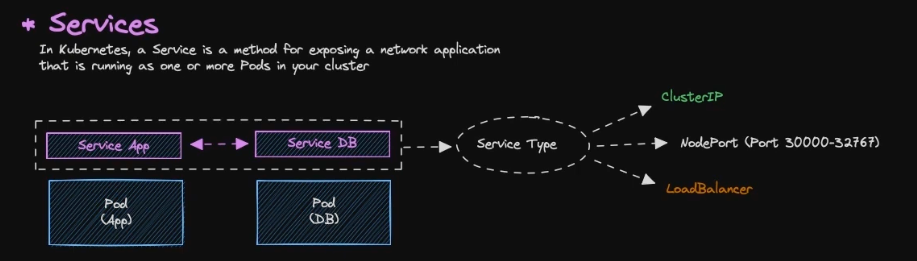
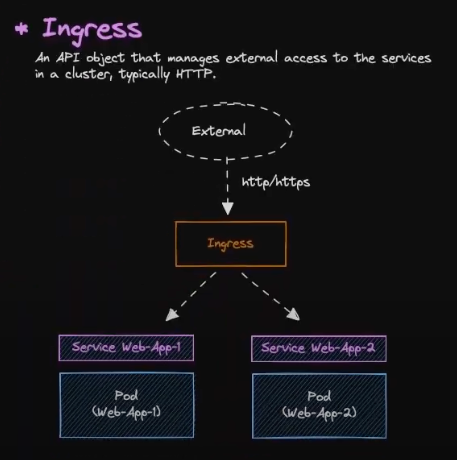
Services
- As default, all resources in Kubernetes are isolated, specifically pods.
- Pods are isolated by default. To enable communication between pods or with the external network, you need to configure Services.
- There are several type of service:
- ClusterIP → Default services, ClusterIP services provide an internal IP address within the cluster that other pods can use to communicate. They are not directly accessible from outside the cluster.
- NodePort (Port 30000-32767) → NodePort services expose a port on each node in the cluster, allowing external access. The port range 30000-32767 is the default range.
- LoadBalancer → LoadBalancer services provision an external load balancer that distributes traffic to multiple pods.
Installation Step by Step
-
Add metallb repository to helm
helm repo add metallb https://metallb.github.io/metallb -
Check the repo list
helm repo ls -
Search the metallb
helm search repo metallb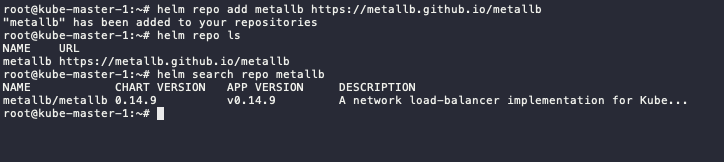
-
Pull the metallb from the repository, it will download tgz file.
# run this in the home dir or other directory
helm pull metallb/metallb
# extract the tgz
tar xvf metallb-* -
Change directory to metallb and if there any configuration changes, you can edit values.yaml
cd metallb

#optional
vim values.yaml -
Install metallb using helm
- Set the chart name to metallb
- Define the file to values.yaml
- Put the namespace to metallb-system
- Enable debug mode
- Create metallb-system namespace
helm install metallb -f values.yaml . -n metallb-system --debug --create-namespace -
Check the status, if the status still init, wait until running.
kubectl -n metallb-system get all
kubectl -n metallb-system get pod -w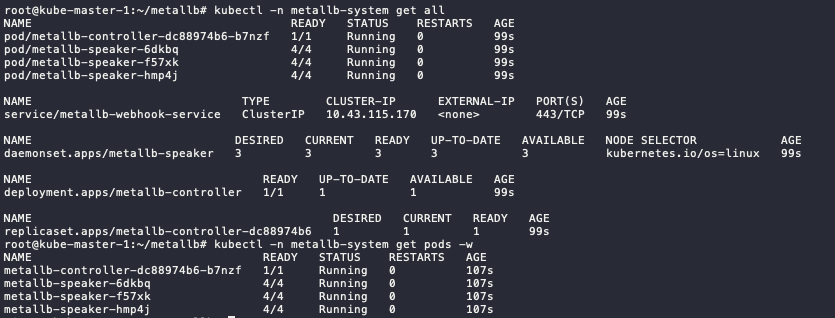
Configuration
-
First, define the address pool on
ipaddresspool.yamlapiVersion: metallb.io/v1beta1
kind: IPAddressPool
metadata:
name: default-pool
namespace: metallb-system
spec:
addresses:
- 10.0.2.11-10.0.2.100 #adjust this range -
Apply the configuration
kubectl apply -f ipaddresspool.yaml
-
Then, we define the L2 Advertisement config on
l2advertisement.yamlapiVersion: metallb.io/v1beta1
kind: L2Advertisement
metadata:
name: default
namespace: metallb-system
spec:
ipAddressPools:
- default-pool -
Apply the configuration
kubectl apply -f l2advertisement.yaml
Test the Load Balancer
-
Run demo app for the testing, the demo app using nginx image.
kubectl run app-demo-1 --image=nginx --port=80

#check the pod status, wait until running
kubectl get pod -
Since by default pod cannot communicate to outside, we need to create the service to expose the pods.
kubectl expose pod app-demo-1 --type=LoadBalancer --target-port=80 --port=80 --name app-demo-1

#check the pods and services
kubectl get all
-
You can access the app using
EXTERNAL-IPofservice/app-demo-1and Nginx landing page will show up.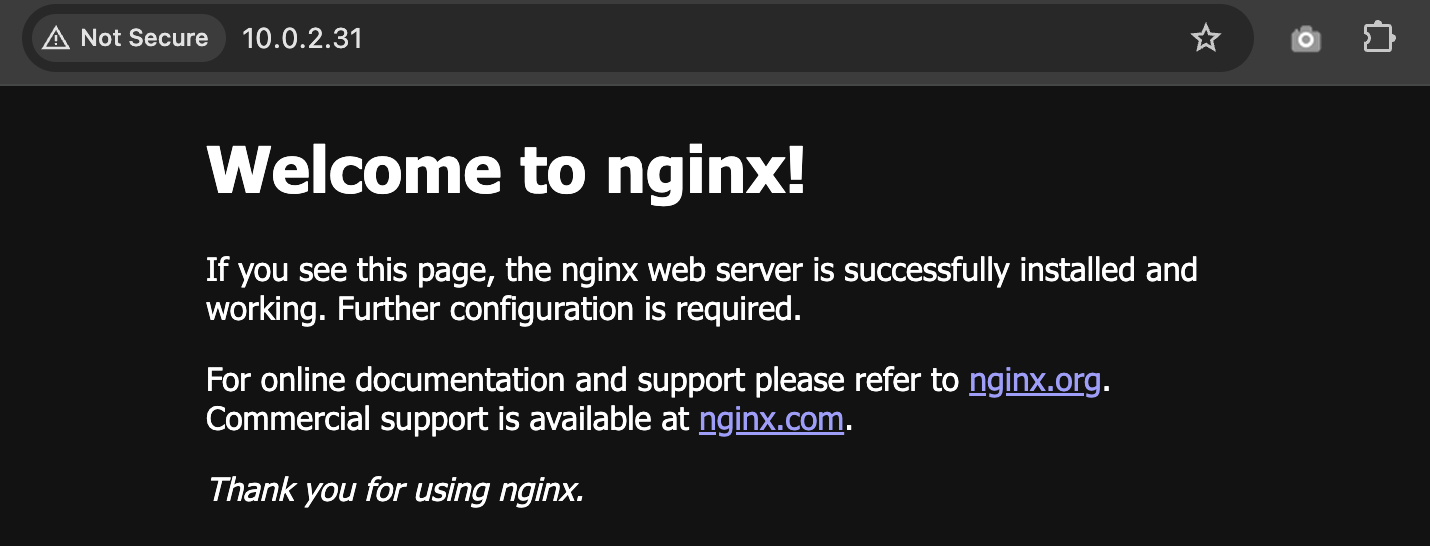
Nginx - Ingress Controller Installation and Configuration
Installation Step by Step
-
Add nginx repository to helm
helm repo add nginx-stable https://helm.nginx.com/stable -
Check the repo list
helm repo ls -
Search the nginx
helm search repo nginx -
Pull the nginx-ingress from the repository, it will download tgz file.
# run this in the home dir or other directory
helm pull nginx-stable/nginx-ingress
# extract the tgz
tar xvf nginx-ingress-* -
Change directory to nginx-ingress and edit
values.yamlfile.cd nginx-ingress
# edit values.yaml
vim values.yaml
# locate ingressClass and change the variable below to true
...
ingressClass:
...
setAsDefaultIngress: true
... -
Install nginx-ingress using helm
helm -n ingress install nginx-ingress -f values.yaml . --debug --create-namespace -
Check the installation
kubectl -n ingress get all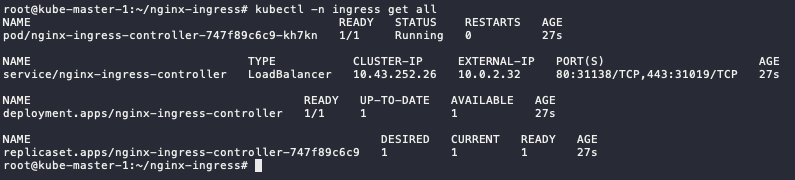
-
The
EXTERNAL-IPis available and reachable, but since no resources use it, it display 404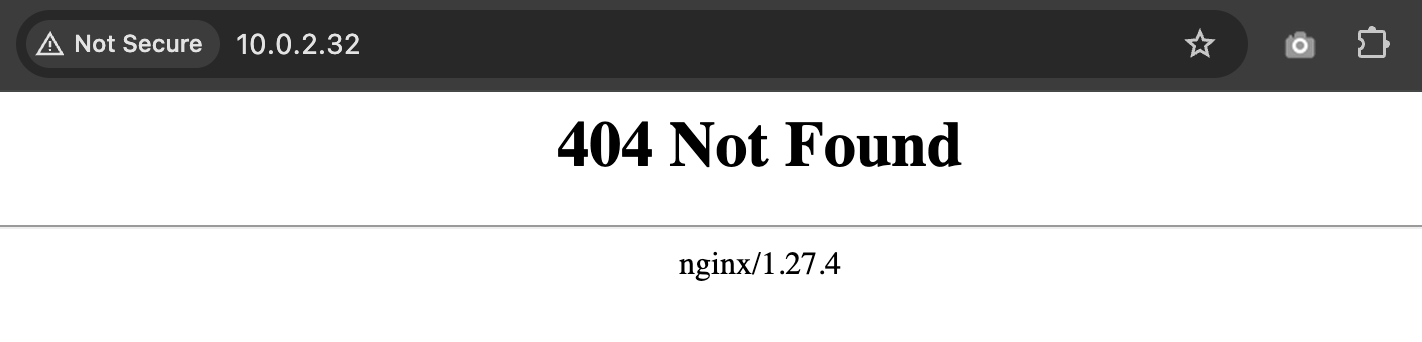
Testing the Ingress
-
Add bitname repository to helm
helm repo add bitnami https://charts.bitnami.com/bitnami -
Check the repo list
helm repo ls -
Search the nginx, we will use bitnami/nginx for the webserver nginx
helm search repo nginx -
Pull the nginx from the repository, it will download tgz file.
# run this in the home dir or other directory
helm pull bitnami/nginx
# extract the tgz
tar xvf nginx-* #make sure the nginx not nginx-ingress -
Change directory to metallb and edit
values.yamlfile.cd nginx
# edit
vim values.yaml
#locate these variables
...
ingress:
enabled: true
...
hostname: nginx.demo.local # make sure this FQDN is pointing to the ingress IP
...
ingressClassName: "nginx" # check using `kubectl get ingressclass`
... -
Install metallb using helm
helm -n demo install demo-app -f values.yaml . --debug --create-namespace -
Check the status, if the status still init, wait until running.
kubectl -n demo get all
kubectl -n demo get ingress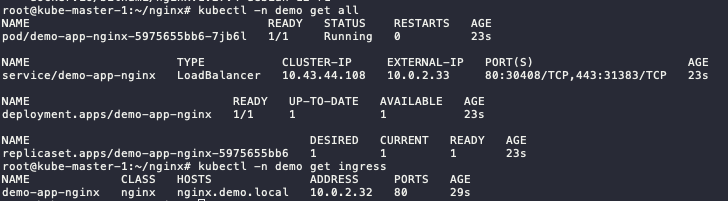
-
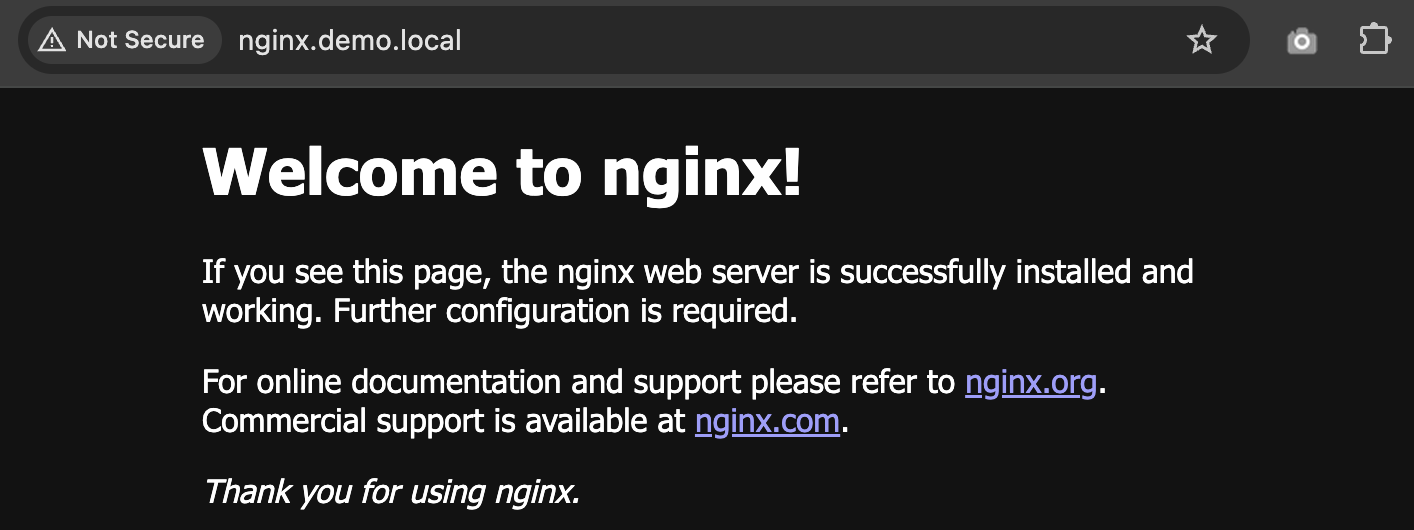
If you configure the FQDN in DNS or /etc/hosts correctly to ingress IP address, it will show like this
CEPH CSI - StorageClass Installation and Configuration
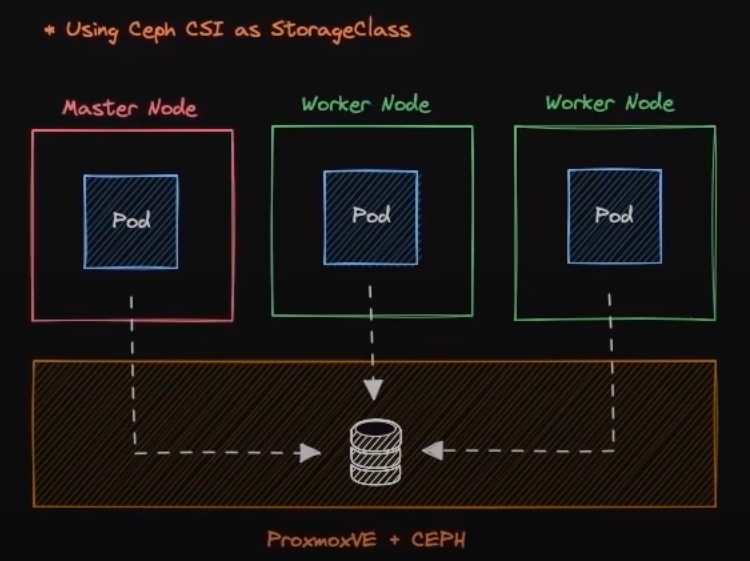
TODO - i don't have CEPH cluster yet 🙈