Personal ASN and IPv6 Journey

Last Update: 25 March 2024
Part 1: ASN Application & Preparation
ASN Application via Lagrange
⛔ Disclaimer: Tidak ada sponsor dari Lagrange cuman discount
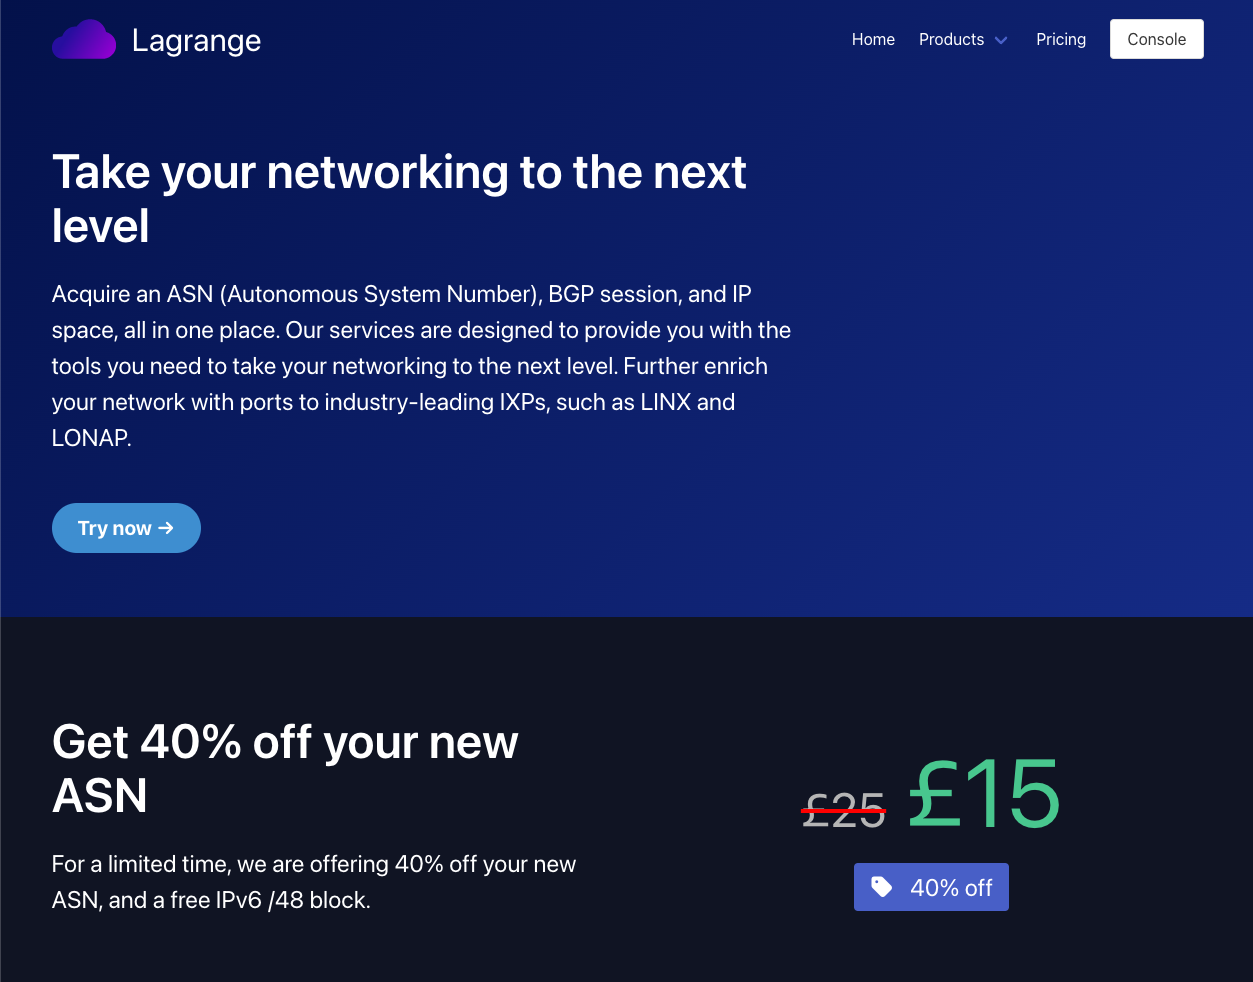
Pendaftaran ASN melalui Lagrange per tanggal 25 Maret 2024 ada discount 40% off dari £25 ke £15.
-
Untuk memulai aplikasi ASN, bisa langsung “Try now” dan lakukan Register akun Lagrange.
-
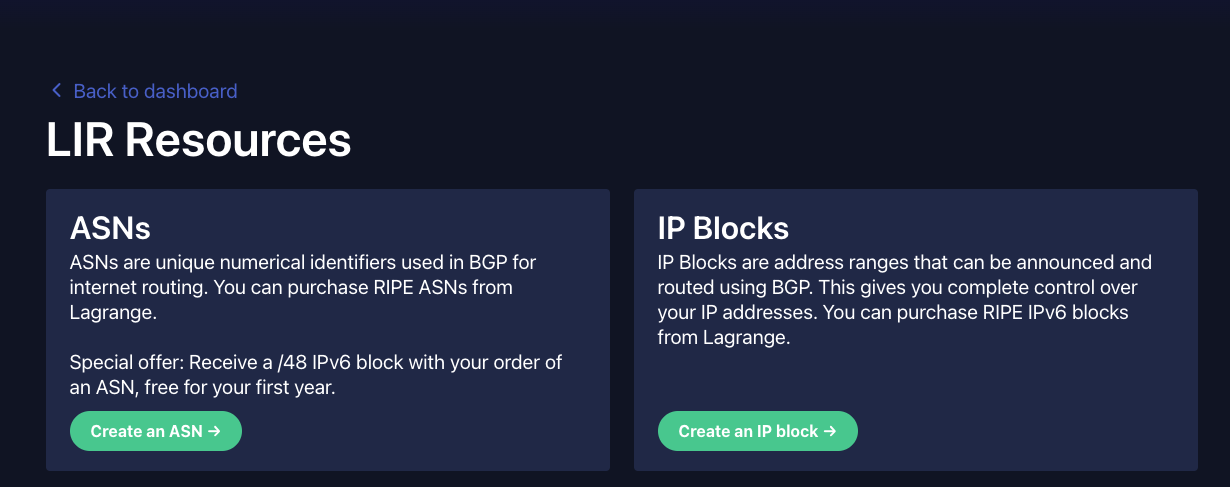
Langsung aja “Create an ASN” di page LIR Services - Lagrange
-
Ikutin proses purchasingnya.
-
Setelah itu akan ada Applicationnya, pilih guided, nanti akan diarahkan untuk proses pembuatan akun dan pembuatan object di RIPE. kalau bingung apa yang di isi bisa juga mengacu ke video dibawah:
-
Video pembuatan object di RIPE : Rifqi Arief in IPv6 Indonesia Telegram Group
-
Pastikan utk mencatat beberapa informasi dibawah saat pembuatan:
RIPE ADMIN-C: [Singkatan_Nama][Identifier]-RIPE (generate dari RIPE)RIPE MNT (mnt-by): bebas tapi uniqueAddress: alamat personalabuse-c: ACR[Identifier]-RIPE(generate saat mengisi abuse-c melalui logo lonceng)mnt-ref: INFERNO-MNT (dari Lagrange) dan mnt-by (punya sendiri)Organisation: ORG-[Singkatan_Nama][IdentifierOrg]-RIPE (generate dari RIPE)
-
-
Di proses ini akan ada beberapa submission di portal Lagrange yang membutuhkan informasi diatas
VPS support BGP Session
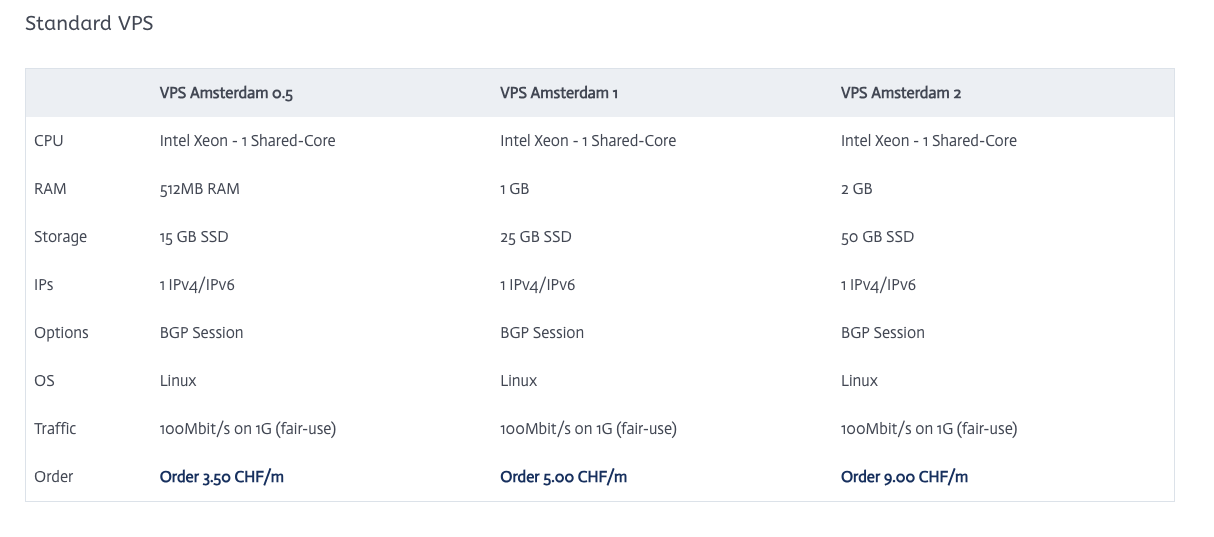
Jika sudah sampai page ini, proses selanjutnya adalah pembelian VPS yang support BGP session.
⛔ Pastikan VPS yang disewa berada pada region EU, seperti Amsterdam, Frankfurt, UK
⛔ Disclaimer: Tidak ada sponsor dari iFog (cuman harga cukup terjangkau)
-
Pilih VPS pada region EU (kasus saya pilih di Amsterdam 1) iFog Website
-
Ikutin proses purchasingnya (payment via CC atau Paypal)
-
Beberapa catatan saat konfigurasi VPS:
- Hostname: FQDN [hostname].[domain].[tld]
- Password: optional
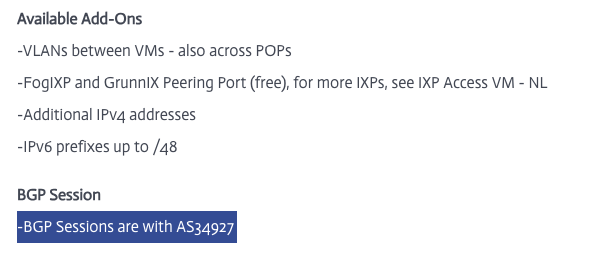
- BGP Session: ✅
- FogIXP Peering port: ✅
- Additional v6 BGP Transit via ASxxxx: optional
-
Simpan Invoice untuk nanti di upload ke ticket Lagrange
-
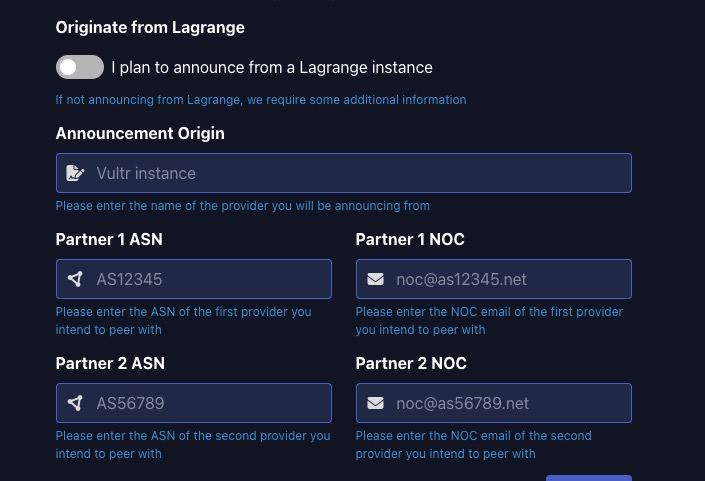
untuk pengisian Lagrange bisa menggunakan panduan berikut:
-
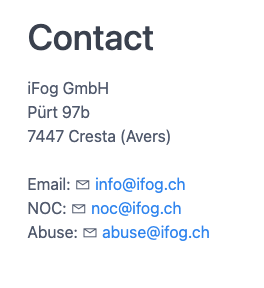
Partner 1 ASN: ASN punya iFog atau VPS provider lainnya. iFog AMS VPS
-
Partner 1 NOC: email dari iFog atau VPS provider lainnya. iFog NOC Contact
-
Partner 2 ASN dan Partner 2 NOC: bisa request sponsor ke grup telegram https://t.me/IPv6_Indonesia. Saya request sponsor ke om @malhuda (Thanks om bantuannya)
-
Setelah submit, upload invoice dari iFog atau VPS provider lainnya di halaman ticket
-
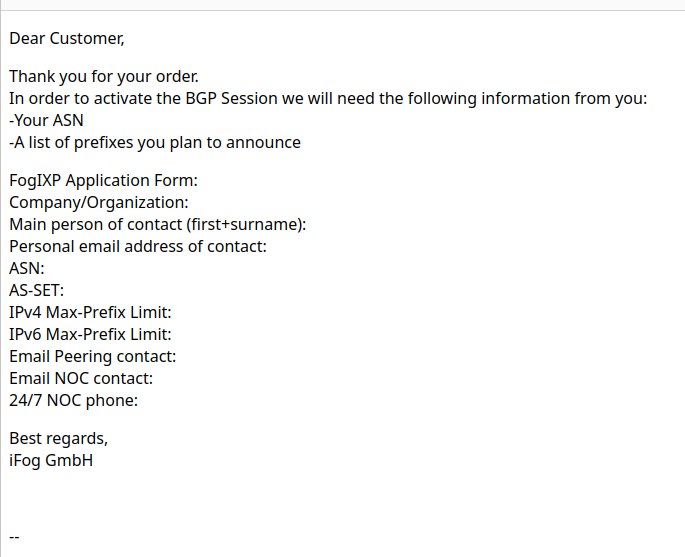
Jika terima email seperti ini dari VPS provider bisa balas “My ASN is still in the process of application, I will contact you after it finished.”
-
Tunggu deh sampe di ASN diterbitkan.
-
Issuing Process

Setelah ini akan ada beberapa proses approval yang dibutuhkan dari Lagrange:
- Document Agreement: Tanda tangan menggunakan DocuSign. Pastikan masukkan kode akses yang sesuai, ada pada tiket.
Positionpada kolom tanda tangan bisa di isiIndividual. - Upload ID: KTP/SIM/Paspor
👨🦳 Catatan Pendahulu
- Tapi kalau mau lepas VPS EU, wajib cari upstream ke EU, Ke netassist atau udn aja atau bgptunnel
- my.bgptunnel.com pake ini om buat presence di EU kalo nanti lepas VPS EU
Peering Application
Setelah ASN terbit, akan ada permintaan utk pengisian Application From dari FogIXP (jika VPS di iFog):
FogIXP Application Form:
Company/Organization: Full NameMain person of contact (first+surname): Full NamePersonal email address of contact: Email sendiriASN: ASxxxxxxAS-SET: ASxxxxxx:AS-SET (buat object baru di RIPE-DB dan add ASN milik sendiri sebagai member, + button)IPv4 Max-Prefix Limit: 0 atau sesuai yg ingin di announceIPv6 Max-Prefix Limit: 2 atau sesuai yg ingin di announceEmail Peering contact: Email sendiriEmail NOC contact: Email sendiri24/7 NOC phone: No Telp SendiriA list of prefixes you plan to announce: Prefix yang didapat dari Lagrange atau sponsor
👨🦳 Catatan Pendahulu
- AS-SET full itu ada ASNnya didepan
- Sudah gak bisa pakai AS-SET pendek
- Karena yah ada drama sblmnya hahhaa
- Tapi kalo penasaran, coba aja
- AS-UPSTREAMS itu untuk upstream ya
- JANGAN DIMASUKKAN KE AS-SET UTAMA
- Pisah ya om
- AS-SET khusus ASN sendiri dan downstream dan AS-SET khusus upstream
- ...Untuk ASXXXXXX:AS-UPSTREAMS itu ditaruh di whois ASN aja, buat import export....
- Jangan dimasukkan / dikirimkan ke peeringdb maupun upstream, langsung digaplok, 100%
- Yang dikirim ke peeringdb maupun upstream, yang ASXXXXXX:AS-SET
- Nah, pengisiannya juga membernya hanya ASN itu, dan downstream
- Selain itu jangan coba coba masukkin, nnti bisa bisa ditabok lagi
PeeringDB
- Lakukan registrasi di PeeringDB.
- Masukkan email yang terdaftar di RIPE.
- Masukkan ASN dan Organization (Nama Lengkap) pada bagian Affiliate with Organization.
Setelah Affiliate sudah di approve, dapat melengkapi informasi di organization (full name, di menu dekat profile ) dan networks (ASN, ada di dalam organization)
Configure route6 in RIPE DB
Setelah mendapatkan alokasi IP, buat object baru di RIPE DB dengan type route6
mnt-by: mnt_sendiri dan yang memberi alokasi
route6: prefix IPv6 (xxxx:xxx::/48)
origin: AS_number
Jika saat membuat route6 gagal (kasus saya alokasi dari Lagrange dengan mnt INFERNO-MNT), dapat membuat tiket di portal Lagrange dengan menyertakan prefix dan mnt_sendiri.
Request RPKI pada block IP
Setelah mendapatkan block IP bisa request ke penyedia prefix untuk setup RPKI melalui open ticket.
Install VPS
Jika berlangganan di iFog, dapat melakukan instalasi VM secara manual setelah mendapatkan akses. rekomendasi OS adalah debian 12 dan disetup secara minimal (tanpa gui).
Untuk mempermudah dapat menambahkan konfigurasi dibawah pada file ~/.ssh/config.
Host bgp-server
  HostName external_ip
  User username
  IdentityFile /path/to/private/key
dan dapat melakukan ssh dengan command dibawah:
ssh bgp-server
Part 2: Config BGP
Preparation
-
Edit network interfaces & sesuaikan masing masing parameter
< >(nama interface mungkin berbeda)vim /etc/network/interfaces# This file describes the network interfaces available on your system
# and how to activate them. For more information, see interfaces(5).
source /etc/network/interfaces.d/*
# The loopback network interface
auto lo
iface lo inet loopback
# The primary network interface
allow-hotplug ens18
iface ens18 inet static
address <IPv4_Public>/<Subnet_mask>
gateway <IPv4_Gateway>
# dns-* options are implemented by the resolvconf package, if installed
dns-nameservers 9.9.9.9
dns-search <domain>
# disable multicast
up ip link set dev $IFACE mtu 1500
up ip link set multicast off dev $IFACE
iface ens18 inet6 static
address <IPv6 Public>
netmask <Subnet_mask>
gateway <IPv6_Gateway>
# dns-* options are implemented by the resolvconf package, if installed
dns-nameservers 2620:fe::fe
dns-search <domain>
# disable multicast
up ip link set dev $IFACE mtu 1500
up ip link set multicast off dev $IFACE
# The secondary network interface to FogIXP
iface ens19 inet6 static
address <IPv6 Public>
netmask <Subnet_mask>
gateway <IPv6_Gateway>
# dns-* options are implemented by the resolvconf package, if installed
dns-nameservers 2620:fe::fe
dns-search <domain>
# disable multicast
up ip link set dev $IFACE mtu 1500
up ip link set multicast off dev $IFACEsystemctl restart networking -
Edit sysctl.conf (backup default jika diperlukan)
# cp /etc/sysctl.conf{,.default}
vim /etc/sysctl.conf
fs.file-max = 16777216
fs.nr_open = 1073741824
kernel.hung_task_timeout_secs = 0
kernel.msgmax = 65536
kernel.msgmnb = 65536
net.core.default_qdisc = cake
net.core.netdev_max_backlog = 30000
net.core.rmem_default = 67108864
net.core.rmem_max = 67108864
net.core.somaxconn = 65536
net.core.wmem_max = 67108864
net.ipv4.conf.all.accept_redirects = 0
net.ipv4.conf.all.accept_source_route = 0
net.ipv4.conf.all.arp_announce = 1
net.ipv4.conf.all.arp_filter = 1
net.ipv4.conf.all.arp_ignore = 2
net.ipv4.conf.all.forwarding = 1
net.ipv4.conf.all.ignore_routes_with_linkdown = 1
net.ipv4.conf.all.rp_filter = 0
net.ipv4.conf.all.secure_redirects = 0
net.ipv4.conf.all.send_redirects = 0
net.ipv4.fib_multipath_use_neigh = 1
net.ipv4.icmp_echo_ignore_broadcasts = 1
net.ipv4.icmp_errors_use_inbound_ifaddr = 1
net.ipv4.icmp_ignore_bogus_error_responses = 1
net.ipv4.icmp_msgs_per_sec = 2500
net.ipv4.icmp_ratelimit = 0
net.ipv4.igmp_max_memberships = 100
net.ipv4.ip_forward = 1
net.ipv4.ip_local_port_range = 1024 65535
net.ipv4.neigh.default.base_reachable_time_ms = 14400000
net.ipv4.neigh.default.gc_thresh1 = 1024
net.ipv4.neigh.default.gc_thresh2 = 2048
net.ipv4.neigh.default.gc_thresh2 = 8192
net.ipv4.neigh.default.gc_thresh3 = 4096
net.ipv4.neigh.default.gc_thresh3 = 16384
net.ipv4.route.max_size = 1073741824
net.ipv4.tcp_congestion_control = bbr
net.ipv4.tcp_dsack = 1
net.ipv4.tcp_fin_timeout = 30
net.ipv4.tcp_keepalive_time = 120
net.ipv4.tcp_l3mdev_accept = 1
net.ipv4.tcp_max_syn_backlog = 8192
net.ipv4.tcp_mem = 4194304 16777216 67108864
net.ipv4.tcp_no_metrics_save = 1
net.ipv4.tcp_rmem = 4194304 16777216 67108864
net.ipv4.tcp_sack = 1
net.ipv4.tcp_syn_retries = 3
net.ipv4.tcp_synack_retries = 3
net.ipv4.tcp_syncookies = 1
net.ipv4.tcp_timestamps = 1
net.ipv4.tcp_window_scaling = 1
net.ipv4.tcp_wmem = 4194304 16777216 67108864
net.ipv6.conf.all.accept_ra_defrtr = 0
net.ipv6.conf.all.accept_ra_pinfo = 0
net.ipv6.conf.all.accept_ra_rtr_pref = 0
net.ipv6.conf.all.accept_redirects = 0
net.ipv6.conf.all.accept_source_route = 0
net.ipv6.conf.all.autoconf = 0
net.ipv6.conf.all.dad_transmits = 0
net.ipv6.conf.all.forwarding = 1
net.ipv6.conf.all.ignore_routes_with_linkdown = 1
net.ipv6.conf.all.router_solicitations = -1
net.ipv6.icmp.ratelimit = 0
#net.ipv6.conf.all.send_redirects = 0
net.ipv6.neigh.default.base_reachable_time_ms = 14400000
net.ipv6.neigh.default.gc_thresh1 = 1024
net.ipv6.neigh.default.gc_thresh2 = 2048
net.ipv6.neigh.default.gc_thresh2 = 8192
net.ipv6.neigh.default.gc_thresh3 = 4096
net.ipv6.neigh.default.gc_thresh3 = 16384
net.ipv6.route.max_size = 32768000
vm.max_map_count = 1048575
vm.swappiness = 100
net.ipv6.conf.all.accept_ra = 0
#net.ipv6.conf.all.proxy_ndp = 1
#net.netfilter.nf_conntrack_acct = 1
#net.netfilter.nf_conntrack_checksum = 0
#net.netfilter.nf_conntrack_max = 65535
#net.netfilter.nf_conntrack_tcp_timeout_established = 7440
#net.netfilter.nf_conntrack_udp_timeout = 60
#net.netfilter.nf_conntrack_udp_timeout_stream = 180
#net.netfilter.nf_conntrack_helper = 1
# net.ipv6.conf.all.disable_ipv6 = 1Config sesuai interface IXP yang dimiliki
### Disable multicast FogIXP Interface ###
net.ipv4.conf.<interface_name>.arp_announce = 1
net.ipv4.conf.<interface_name>.arp_filter = 1
net.ipv4.conf.<interface_name>.arp_ignore=2
net.ipv4.conf.<interface_name>.arp_notify=1
net.ipv4.conf.<interface_name>.proxy_arp = 0
net.ipv4.conf.<interface_name>.rp_filter=0
net.ipv4.neigh.default.gc_interval = 30
net.ipv4.neigh.<interface_name>.base_reachable_time_ms = 14400000
net.ipv4.neigh.<interface_name>.gc_stale_time = 60
net.ipv6.conf.<interface_name>.accept_ra = 0
net.ipv6.conf.<interface_name>.autoconf = 0
net.ipv6.conf.<interface_name>.router_solicitations = -1
net.ipv6.neigh.default.gc_interval = 30
net.ipv6.neigh.<interface_name>.base_reachable_time_ms = 14400000
net.ipv6.neigh.<interface_name>.gc_stale_time = 60
sysctl -p
# or
reboot -
Pre Setup (optional)
Github: Xeoncross/lowendscript, scope:
- update_timezone
- remove_unneeded
- update_upgrade
- install_dash
- install_vim
- install_nano
- install_htop
- install_mc
- install_iotop
- install_iftop
- install_syslogd
- install_curl
- apt_clean
wget --no-check-certificate https://raw.github.com/Xeoncross/lowendscript/master/setup-debian.sh
chmod a+rx setup-debian.sh
./setup-debian.sh system -
Timezone and NTP
apt install ntp -yEdit NTP configuration
vim /etc/ntp.confserver 0.debian.pool.ntp.org iburst
server 1.debian.pool.ntp.org iburst
server 2.debian.pool.ntp.org iburst
server 3.debian.pool.ntp.org iburstsudo systemctl restart ntpSet Timezone and see status
timedatectl set-timezone Asia/Jakarta
timedatectl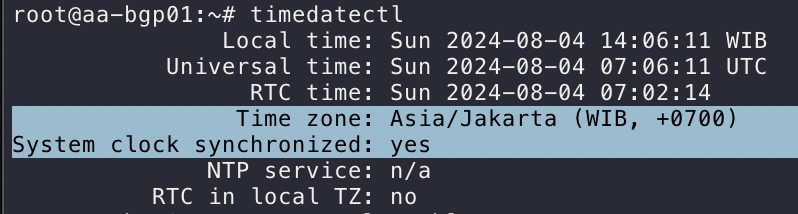
Konfigurasi Pathvector
-
Install Pathvector dan Bird2
curl https://repo.pathvector.io/pgp.asc > /usr/share/keyrings/pathvector.asc
echo "deb [signed-by=/usr/share/keyrings/pathvector.asc] https://repo.pathvector.io/apt/ stable main" > /etc/apt/sources.list.d/pathvector.list
apt update && apt install -y pathvector bird2 -
Konfigurasi /etc/pathvector.yml
vim /etc/pathvector.ymlfirst block
asn: <your_asn>
bgpq-args: "-S AFRINIC,APNIC,ARIN,LACNIC,RIPE"
default-route: false
irr-query-timeout: 30
irr-server: "rr.ntt.net"
merge-paths: true
peeringdb-api-key: "<peeringdb_api_key>"
peeringdb-query-timeout: 30
prefixes:
  - "<prefix_plan_to_be_announce>"
  - "<prefix_plan_to_be_announce>"
router-id: "<an_ipv4_address>"
rtr-server: "172.65.0.2:8282"
Catatan
- Ubahlah your_asn menjadi ASN anda.
- Lalu, IRR hanya valid untuk AFRINIC, APNIC, ARIN, LACNIC, RIPE
- Tidak menerima rute default
- IRR server menggunakan NTT
- Ubah peeringdb_api_key dengan kunci milik anda sendiri. Hak akses pada PeeringDB gunakan hanya baca
- Ubahlah prefix_plan_to_be_announce dengan prefix yang akan di gunakan.
- Ubahlah router-id dengan IPv4 VPS anda (atau gunakan IP lokal jika memang tidak ada IP publiknya (karena hanya sebagai pengenal saja)).
- rtr-server menggunakan Cloudflare
Aktivasi kernel karena akan menggunakan full table
kernel:
  learn: true

# BGP Large Communities
# <your_asn>:1:1 - Learned from upstream
# <your_asn>:1:2 - Learned from route server
# <your_asn>:1:3 - Learned from peer
# <your_asn>:1:4 - Learned from downstream
# <your_asn>:1:5 - Learned from iBGP
Template (ganti your_asn dengan ASN yang dimiliki gunakan sesuai kebutuhan)
templates:
  upstream:
    add-on-import:
      - <your_asn>:1:1
    allow-local-as: true
    announce:
      - <your_asn>:1:4
    local-pref: 100
    remove-all-communities: <your_asn>

  routeserver:
    add-on-import:
      - <your_asn>:1:2
    announce:
      - <your_asn>:1:4
    auto-import-limits: true
    enforce-first-as: false
    enforce-peer-nexthop: false
    filter-transit-asns: true
    local-pref: 200
    remove-all-communities: <your_asn>

  peer:
    add-on-import:
      - <your_asn>:1:3
    announce:
      - <your_asn>:1:4
    auto-as-set: true
    auto-import-limits: true
    filter-irr: true
    filter-transit-asns: true
    irr-accept-child-prefixes: true
    local-pref: 300
    remove-all-communities: <your_asn>

  downstream:
    add-on-import:
      - <your_asn>:1:4
    allow-blackhole-community: true
    announce:
      - <your_asn>:1:1
      - <your_asn>:1:2
      - <your_asn>:1:3
    auto-as-set: true
    auto-import-limits: true
    filter-irr: true
    filter-transit-asns: true
    irr-accept-child-prefixes: true
    local-pref: 400
    remove-all-communities: <your_asn>

  ibgp:
    allow-local-as: true
    asn: <your_asn>
    direct: true
    enforce-first-as: false
    enforce-peer-nexthop: false
    filter-irr: false
    filter-rpki: false
    next-hop-self: true
    remove-all-communities: <your_asn>
Catatan:
- Template
upstreamhanya digunakan untuk transit AS - Template
routeserverhanya digunakan untuk peering ke routeserver - Template
peerhanya digunakan untuk melakukan bilateral peering - Template
downstreamhanya boleh dipakai untuk melakukan downstream AS pihak lain - Template
ibgphanya digunakan untuk AS yang sama
Template peers (gunakan sesuai kebutuhan)
peers:
############
# UPSTREAM #
############
  upstream_name:
    asn: neigh_asn
    disabled: false
    listen6: "<local_address>"
    local-pref: 100
    neighbors:
      - "<neigh_address>"
    template: upstream

###############
# ROUTESERVER #
###############
  routeserver_name:
    asn: neigh_asn
    disabled: false
    listen4: "<local_address>"
    listen6: "<local_address>"
    local-pref: 200
    neighbors:
      - "<neigh_address>"
      - "<neigh_address>"
    template: routeserver

###########
# PEERING #
###########
  peering_name:
    asn: neigh_asn
    disabled: false
    listen6: "<local_address>"
    local-pref: 300
    neighbors:
      - "<neigh_address>"
    template: peer

############
# INTERNAL #
############
  ibgp_name:
    add-on-import:
      - <your_asn>:1:1
    announce:
      - <your_asn>:1:1
    disabled: false
    listen6: "<local_address>"
    local-port: 179
    local-pref: 150
    neighbor-port: 179
    neighbors:
      - "<neigh_address>"
    template: ibgp
Generate bird config:
pathvector generateCek Routing sudah masuk atau blm
ip -6 routeCek status BGP
birdc show protocol -
Set cron untuk update IRR prefix lists dan PeeringDB prefix limits setiap 12 jam.
#crontab -e
0 */12 * * * pathvector generate
Reference
- https://pathvector.io/docs/installation
- https://t.me/IPv6_Indonesia/104851
- https://www.youtube.com/watch?v=a51noB2brjM
Part 3: Set Up Interface
-
Buat dummy interface script
vim /usr/local/bin/setup-dummy-interface.sh#!/bin/bash
ip link add dummy0 type dummy
ip addr add <YOUR_IPV4_INTERFACE_IP>/24 dev dummy0
ip addr add <YOUR_IPV6_INTERFACE_IP>/64 dev dummy0
ip link set dummy0 upchmod +x /usr/local/bin/setup-dummy-interface.sh -
Buat Systemd Service
vim /etc/systemd/system/dummy-interface.service[Unit]
Description=Setup Dummy Interface
After=network.target
[Service]
ExecStart=/usr/local/bin/setup-dummy-interface.sh
RemainAfterExit=yes
[Install]
WantedBy=multi-user.targetsystemctl enable dummy-interface.service
systemctl start dummy-interface.service -
Test Koneksi
-
Ping
ping -I <YOUR_IPV4_INTERFACE_IP> 8.8.8.8
ping6 -I <YOUR_IPV6_INTERFACE_IP> 2001:4860:4860::8888 -
Curl
curl --interface <YOUR_IPV4_INTERFACE_IP> -4 ifconfig.me
curl --interface <YOUR_IPV6_INTERFACE_IP> -6 ifconfig.me -
mtr
mtr -I dummy0 google.com
-
Part 4: Tunnel ke Rumah atau DC
Main Server (BGP Router)
-
Install wireguard
apt update
apt install wireguard -
Generate Wireguard Private dan Public key
wg genkey | tee /etc/wireguard/private.key
chmod 600 /etc/wireguard/private.key
cat /etc/wireguard/private.key | wg pubkey | tee /etc/wireguard/public.key

# Baris Pertama Private Key
# Baris Kedua Public Key -> simpan untuk konfigurasi client server -
Buat Konfigurasi Wireguard di /etc/wireguard/wg0.conf
[Interface]
PrivateKey = <Your-Main-Server-Private-Key>
Address = <Your-Main-Server-IPv6-Allocation>/64
ListenPort = 51820
Table = off

[Peer]
PublicKey = <Your-Client-Public-Key> #setelah digenerate
AllowedIPs = <Your-Client-IPv6-Allocation>/128 -
Enable dan Start Wireguard Setelah Public Key Client di generate
systemctl enable wg-quick@wg0
systemctl start wg-quick@wg0 -
Konfigurasi forwarding
# Port Forwarding for IPv4 - opsional jika announce IPv4
net.ipv4.ip_forward=1

# Port forwarding for IPv6
net.ipv6.conf.all.forwarding=1 -
Apply konfigurasi forwarding
sudo sysctl -p
Client Server (Home Server) - Debian/Ubuntu
-
Install wireguard
apt update
apt install wireguard -
Generate Wireguard Private dan Public key
wg genkey | tee /etc/wireguard/private.key
chmod 600 /etc/wireguard/private.key
cat /etc/wireguard/private.key | wg pubkey | tee /etc/wireguard/public.key

# Baris Pertama Private Key
# Baris Kedua Public Key -> Masukkan ke konfigurasi main server -
Buat Konfigurasi Wireguard di /etc/wireguard/wg0.conf
[Interface]
PrivateKey = <Your-Client-Private-Key>
Address = <Your-Client-IPv6-Allocation>/64
DNS = 2606:4700:4700::1111
DNS = 2606:4700:4700::1001

[Peer]
PublicKey = <Your-Main-Server-Public-Key>
Endpoint = <Main-Server-Public-IPv6>:51820
AllowedIPs = ::/0
PersistentKeepalive = 25 -
Enable dan Start Wireguard Setelah Public Key Client digenerate
systemctl enable wg-quick@wg0
systemctl start wg-quick@wg0
Uji Coba di Client Server
-
Ping
ping6 -I <YOUR_IPV6_INTERFACE_IP> 2001:4860:4860::8888 -
Curl
curl --interface <YOUR_IPV6_INTERFACE_IP> -6 ifconfig.me -
mtr
mtr -I dummy0 google.com
Miscellaneous
Generate Wireguard QRCode
apt install qrencode
qrencode -t ansiutf8 < /etc/wireguard/wg-client.conf
https://www.cyberciti.biz/faq/how-to-generate-wireguard-qr-code-on-linux-for-mobile/
Reference
- https://www.reddit.com/r/homelab/comments/153uwj9/want_to_get_started_with_bgp_links_that_helped_me/
- https://chown.me/blog/getting-my-own-asn
- https://amanjuman.medium.com/setting-up-bgp-routing-with-pathvector-and-bird-on-ubuntu-3f8b92a01669
- https://www.animmouse.com/p/my-asn-journey-configuring-bgp-on-vps/
- https://www.animmouse.com/p/my-asn-journey-bring-home-the-ipv6-via-wireguard/
- https://docs.vultr.com/configuring-bgp-on-vultr